Here's how...


 You basically now have a fabric tube... Through one of the open ends, invert the fabric, so that the right side is now showing on the outside... the seamed edge should be on the inside...
 Press your seamed edge...
 You also need to iron the folded edge, so that length of the cowl is nice and smooth...
 Pick one of the open ends... and iron a 1/2" fold to the inside... all the way around the opening...


 Pin to hold in place... You will now have a circle of fabric with a twist in it... Finish pinning down the entire opening...
 Here are some more views of how I pined the opening(seam) closed... Make sure you take the time to do it correctly. You'll want to keep checking that your fabric is still overlapping evenly...

 Using a narrow zig zag stitch... with a shorter stitch length...

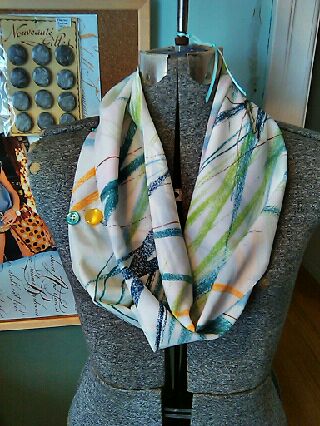
 I sewed on a few vintage buttons... for some added detail...
All done! You've successfully added some spring into your wardrobe, without having to give up your scarf... If any of these steps look confusing, just let me know... I am more that happy to help! ***Jennifer
P.S. If you would like to see variations of this cowl... I am very excited to announce that Creating Bits of Envy now has it's own Flickr group... I will post some more pictures over there... Just click Here to check it out! I would love to see yours if you make one... And I would so so so LOVE to see any pictures from projects you've worked on that were inspired by my blog... My goal for this Flickr group, is not only see your great projects, but to also offer help, and cheer eachother on! So if you've made a mastake, or are stumped on a project, upload those pictures too... I would love to help!!!
P.S.S Don't forget Kids Clothes Week is coming up... April 23rd - 30th... She has some great project inspirations if you can't decide what to do...
No comments:
Post a Comment