Showing posts with label sewing. Show all posts

Sunday, April 22, 2012

Get Ready... Get Set... Sew!

Just a reminder Kids Clothes Week Challenge starts tomorrow...  Have you decided what your doing yet?  I think I've got it narrowed down... but I'm keeping it a secret for now... 

This will be my 2nd time joining the KCWC challenge...  Since I made myself stick to just one hour(I literally set a timer, because I had so many other projects to get done!)  I can remember myself having a few conniption fits about getting stuff done... and toward the end I totally cut corners... but that being said... in the end it was totally satisfying... If you missed what I did in the Fall KCWC... here is a recap...
Vintage dress pattern...and vintage knit fabric...
You can read more about it Here... and Here

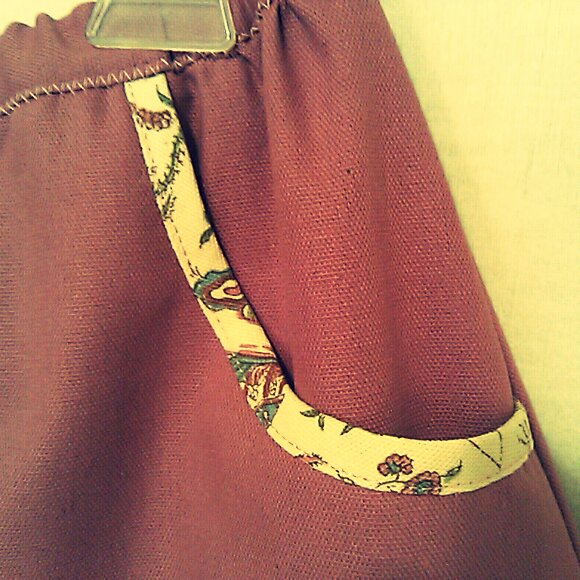
This cute ensemble is Lisette for Simplicity...
You can read more about it Here... and Here...


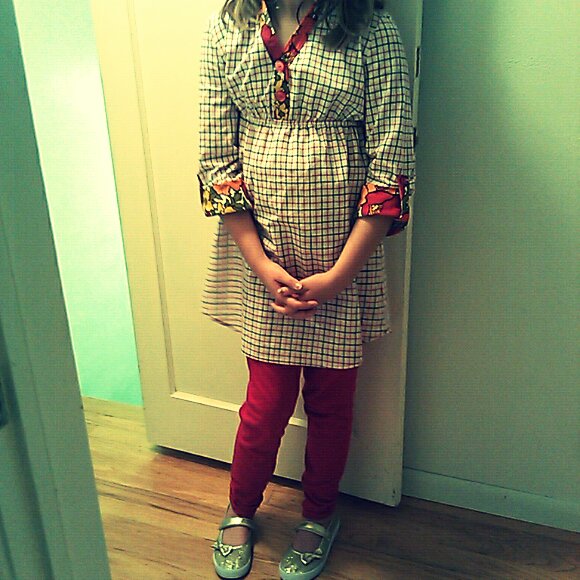
Tunic and ruched leggings...
You can read more about it Here... Here...
and Here...


My lucky daughter got three new outfits... and she has worn them multiple times... SO happy that she still thinks me making stuff for her is cool...
Well... I am exited for tomorrow to come, and how much I can get done with my hour of time... Check back tomorrow, to see what I am going to be working on this week...
Happy sewing!
***Jennifer

P.S. Did you know Creating Bits of Envy has it's own Flickr group now? If you are going to join me in the challenge this week... Please consider joining my Flickr group! I would love to see your progress, and cheer you on!!!


Sunday, October 16, 2011

Sew What! Day 7...

Well today is the last day of kid clothes week, and I determined to push through... finishing my third outfit for the week!  Wow!  I feel so productive this week... Not only did my daughter get some new Fall clothes, but I only used things I already had (some for years!)... so it did not cost me anymore out of pocket.  It pays sometimes to be a hoarder (he he he).  So here is the last outfit, and a review of what I did this week...
The shirt...
Vintage buttons add a nice touch... and I love the rolled cuff with a tab...
These are simple leggings... but I gathered the side...

Here are all three outfits on Violet...
Outfit #1  Dress trimmed with Ric rack and ribbon...


Outfit #2  Ruffled top... skirt with pockets...


Outfit #3  Tunic top... and gathered legging...

Thanks for following me this week, and your support... Kids clothes week was fun!  I will definitely do it again...  Even though this challenge has come to a close... check back in with me soon, because I'm always up to something...
Jennifer

Wednesday, October 12, 2011

Sew What! Day 3

Oh... man!  Did not get my hour in until 4:30pm today!  In any case I conquered Day 3 of the kids clothes challenge... largely because I cut out my next project last night, so I could just focus on sewing today... here is what I worked on...

This is a new pattern I bought at Joann's (I heard that collective gasp!  I do use new patterns sometimes too)
I decided to start the skirt first, because I knew I could get that done in an hour...

It turned out pretty cute...


Love the contrasting bias tape on the pocket...

Since I was putting in an elastic waistband I thought I would share with you my quick and easy way...
With the desired length of elastic... stitch ends together to form a circle(this is sewn on  with waist band already attached to skirt/pants, and in place of making a casing for the elastic.) Divide elastic into 1/4's.  Pin to the right side of the waistband... at the sides, and to the center front/back...


Pulling even with the fabric... zig zag the elastic to the the right side of the waistband...
 
Fold over elastic to the inside... you can then pin in place again...


Or, I had smaller elastic than the pattern called for, so I folded it over again to meet up with the waistband seam...
  

When you have the elastic pined in place, then you zig zag stitch on the outside... making sure to keep the elastic pulled taunt while stitching...

This is how the finished waistband looks from the outside...

And this is how it looks from the inside...

I really like doing elastic waistbands this way, because it keeps the elastic from turning inside of the casing...  Hope this is helpful for some of you!  See you on Day 4... I will be working on the match ing shirt...

P.S.  This is how Violet looked in her dress... very cute and cozy!  Don't let the serious face fool you... she loved the dress, but was taking her modeling very seriously...

Tuesday, September 27, 2011

Adding some color to my life...

OK... (Deep Breath)  Lets get this started!  I have done a lot of thinking, and I think the easiest way to start my journey into this blogging world would be to just share with you what I'm doing this week...  Adding color to my life...
 
***My first inspiration this week was a 70's retro scarf I purchased at Estate sale... I had so much fun playing around with it, knew instantly this was going to be my favorite accessory for this Fall...  

So what did I do?  I made my own pattern, and sewed some up!


I have a craft show coming up for Bits of Envy (one of my hobbies is making accessories out of vintage fabric and buttons), and I think these will be a fun addition...

Here are some of the different ways I came up with to wear the neck tie...


***My next inspiration came from a suitcase I got for free a couple months ago... It is blue with gold fleck.  I was so happy to add it to one I already had... making it the perfect end table for my beloved sectional couch... Over the weeks it has continually caught my eye, and brought a smile to my face... then the idea popped in my head...  I need to somehow recreate that affect on my living room walls.  
So this week I started stenciling 50's star bursts...  Here is how I created the look for under $10....
First I found a pattern I liked online.  I thought this plate was prefect!

Then I got a blank stencil (found at Walmart for $2.97) and traced the pattern onto it... (I pasted it into Microsoft publisher, and then cropped it to the size wanted)       
Next you need to cut out the stencil on a protected surface with a xacto knife...

I selected my paint colors (.97cents for the colors, and $1.47 for the metallic... also purchased at Walmart)  I got 2 blue, 2 metallic gold, one green, and one orange...

Now we are ready to Paint!
Because I wanted a layering affect I cut out two stencils... I started with the bottom layer first...

Then I added the second layer... I also dry brushed gold paint over both stencils to give it that gold fleck effect...


Both stencils done!  I LOVE IT!!!!
Well... that should be enough to keep me busy...  Your mission this week if you chose to accept, is to put some color in your life... It will lift your spirits, even if it's just a new color of lipstick!