Showing posts with label bits of envy. Show all posts

Saturday, October 15, 2011

Sew What! Day 6...

Well day 6 is here for kids clothes week, and I did not get as much done as I hoped... Here is the progress I've made so far on the top...
 
Not to far along... but, I think tomorrow will go much faster...
     
 Part of what took so long, was the print
 I was using...
          
I had to make sure I lined it up properly...


Also, all of the flower print pieces had to be faced and top stitched....

Well... that was what my hour was spent on today.  Here's to more progress tomorrow!  I hope to complete this shirt!  How are your projects coming along?  Happy Sewing!


Friday, October 14, 2011

Sew What! Day 5...

Day 5 of the kids clothes week, and my top is done!  Now I have two outfits complete... Yay!

The shirt for yesterday is finished!  Love the ruffles and gathered sleeve...


The complete outfit!  Fits perfect....

Now to get ready for tomorrow... more vintage fabric...

More Fall clothes for my daughter... again from Joann's...

Tomorrow I think I'll start on the shirt... it's got quite alot of details... wish me luck! 


Wednesday, October 12, 2011

Sew What! Day 3

Oh... man!  Did not get my hour in until 4:30pm today!  In any case I conquered Day 3 of the kids clothes challenge... largely because I cut out my next project last night, so I could just focus on sewing today... here is what I worked on...

This is a new pattern I bought at Joann's (I heard that collective gasp!  I do use new patterns sometimes too)
I decided to start the skirt first, because I knew I could get that done in an hour...

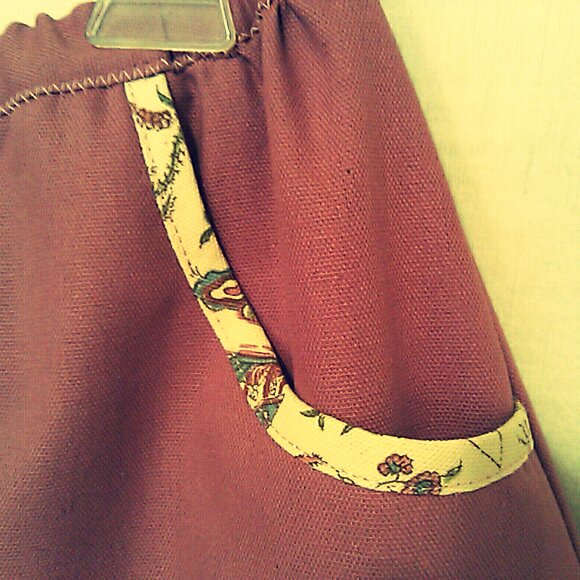
It turned out pretty cute...


Love the contrasting bias tape on the pocket...

Since I was putting in an elastic waistband I thought I would share with you my quick and easy way...
With the desired length of elastic... stitch ends together to form a circle(this is sewn on  with waist band already attached to skirt/pants, and in place of making a casing for the elastic.) Divide elastic into 1/4's.  Pin to the right side of the waistband... at the sides, and to the center front/back...


Pulling even with the fabric... zig zag the elastic to the the right side of the waistband...
 
Fold over elastic to the inside... you can then pin in place again...


Or, I had smaller elastic than the pattern called for, so I folded it over again to meet up with the waistband seam...
  

When you have the elastic pined in place, then you zig zag stitch on the outside... making sure to keep the elastic pulled taunt while stitching...

This is how the finished waistband looks from the outside...

And this is how it looks from the inside...

I really like doing elastic waistbands this way, because it keeps the elastic from turning inside of the casing...  Hope this is helpful for some of you!  See you on Day 4... I will be working on the match ing shirt...

P.S.  This is how Violet looked in her dress... very cute and cozy!  Don't let the serious face fool you... she loved the dress, but was taking her modeling very seriously...

Tuesday, October 11, 2011

Sew What! Day 2

With day 2 of kids clothes week, I feel a little more productive.  Got my first project done...

I can't wait to put this on the Daughter... it is prefect for the rainy weather we are having...


Remember the markings I said were important yesterday?  Well they made applying the trim a breeze...

Since I had to sew in a zipper... I thought I would share with you my trick to sewing in a perfect zipper... First you baste the seam closed with right sides together...
Next you iron the seam open, and pin the zipper right side down (on wrong side of fabric) with the teeth directly over the seam...
Then on the outside(right side of fabric), using your zipper foot, stitch in place about a 1/4 inch away from the seam...
 Pull out the basting stitch...
And now you have a perfect zipper...


Well, It was nice to feel productive today... hope your projects are coming along... see you on day 3...

Monday, October 10, 2011

Sew What!


It is KCWC kids clothes week and I have signed up for the challenge!  I need another project like I need another hole in my head, but I'm jumping in with both feet... The task is simple... devote 1hour everyday, (10/10-10/17) and sew some clothes for the kid in your life... I am going to work on some fall clothes for my daughter Violet... Wish me luck!  I will post my hour progress everyday this week, so check back to see how far I've gotten... Are you going to join me?  Happy sewing!
 
Ready...set...go!  Since I have so many projects going, I really did set a timer... here's what I did with my hour...


This is my first project... vintage 1967...


I always take the time to line up my grain line... and mark the lines... it makes putting it together so much easier...

These lines will help me easily pin on some rick rack or lace...

All cut out and marked... now to sew...

 When sewing on knits it is always a good idea to use a knit stitch... it allows the seams some stretch, without breaking the thread... This is the setting on my 401, it is a very narrow zig zag stitch... it almost looks straight...

  
So with the few minutes I had left I was able to sew the front and back center seams... That's my stopping point for today... If anyone is taking on this challenge with me I would love to hear about your progress!  See you tomorrow for day 2...

Putting some Fall in my wordrobe...

My favorite part of the week is Friday... this is the day that I can unwind, enjoy a cup of coffee, and search for treasures...

This week I found a vintage velvet jacket... just in time for Fall...


I paid a whopping $6 for it... who says fashion has to be expensive?

   
The only thing I didn't like were the buttons... 
So I switched them out with some black vintage glass buttons...
Makeover complete... sometimes it's the little things that make a big difference!
***The second piece for Fall that I put in my wardrobe was a sweater vest...
I am in love with this seasons trend... layering lacy slips with sweaters...

I started with this vintage 70's pattern... 


I had just enough of this vintage sweater knit to cut out for the front...


But, I had to use this plain red sweater knit for the back...


To give more detail to the belt, I layered lace over green seam tape(on top of the red belt pieces) and then zigzag stitched it down... encasing the green tape down the middle...
 
After it was completed, I felt the belt was to bulky to tie... so I improvised a bow closure instead...

Snaps ensure it stays put...
 
I could not wait to wear this with my vintage slip(Grandma's)... paired with my beloved rain boots made it a fun and functional outfit... Love the mix of frilly and rugged... I've been known to be described as eclectic, but I don't mind if that means I get to have fun with my clothes... 

So, I challenge you to take look at your wardrobe this week... bring out those long forgotten slips, and layer them with sweaters...coats.. or over sized shirts.  Have a jacket or dress you never wear?  Try changing out the buttons, for a completely new look... I try every season to inventory what I have... sometimes it just takes seeing it in a different light, to make it new again...